
A Complete Vue 3 Setup — Part IV

Just like Gandalf the Grey marked Bilbo Baggins’ door with a shining rune, signaling the start of his unexpected journey, I invite you to mark in your hearts the beginning of a beautiful modern structure for projects using Vue3.
In the last post we finished our shareable components structure, using Vue3 + quasar + Typescript + Jest + Prettier + ESLint + Husky (phew…), and on top of that we set up Npm + Github packages to distribute our library.
Now, we’ll create a parent project structure (we’ll call it Scaffolding), which will use our shareable components alongside other libraries and patterns.
// List of what we will use in the project
Vue3
Typescript
Eslint
Prettier
Husky
Vitest (Unit tests)
Pinia (Global state management)
Axios (Consuming RestApis)
VueI18n (Translation)
quasar (Design System)
Vue router (Routing)
Creating a Vue3 project with Vite
Note: We already went through this process in the first tutorial, but I’ll repeat it here for those who missed it or didn’t quite catch the idea.
yarn create vite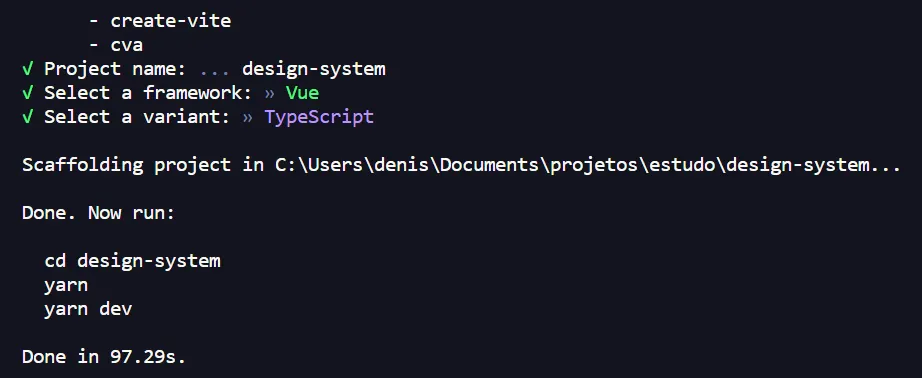
In our case we chose to work with Typescript, but you can opt for Javascript if you prefer. Right after the creation, we’ll go into the project folder, install the dependencies and run our project.
cd design-system
yarn
yarn dev
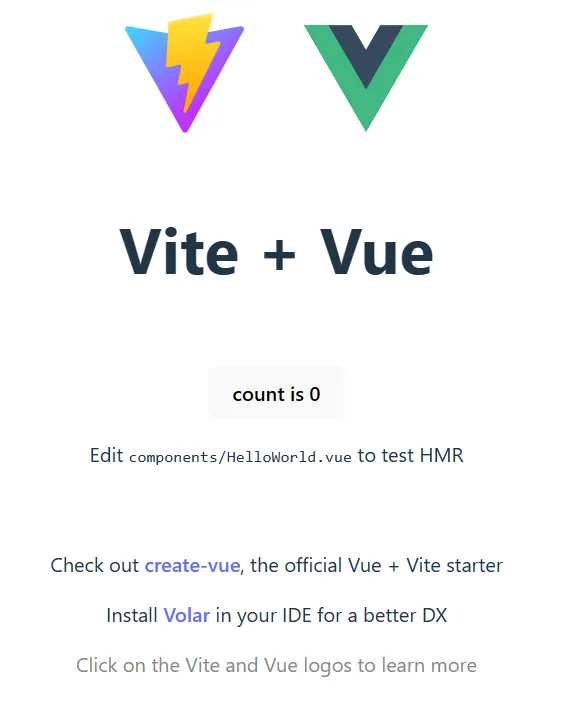
Once that’s done you’ll have an app running on localhost similar to this one:
Installing ESLint, Prettier, Husky and quasar
The installation of ESLint, Prettier and Husky you can follow along using Part II of this series. The installation of quasar can also be done the same way as taught in Part I.
Installing and configuring the routes
Now that we’ve followed the previous tutorials, you already have a Vue3 structure, created with Vite, and with Typescript, Prettier, ESLint and Husky installed. The steps up until now were identical to what we did in the Design System app, but now we’ll install a new library, Vue Router!
“Vue Router handles all the management of which content should be shown on the screen based on the url the user is accessing, and this control, when well built, gives the application great dynamism.” — Google, Cupcom Website.
In short, in a SPA (Single Page Application) web app, instead of redirecting the user to links (an <a href> tag), as is done on static sites, all the “route” control is managed by the router — in Vue3, we use Vue Router.
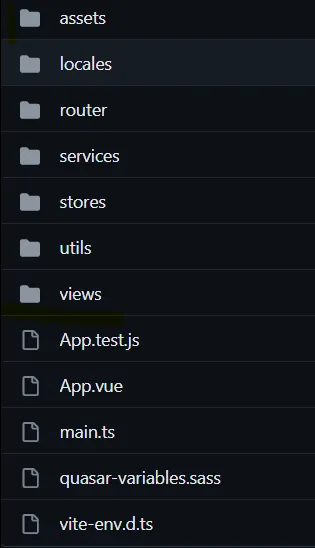
First things first — let’s set up a basic project structure, meaning we’ll just create the folders that will hold our components, routes, services, etc. Create the folders in your app as shown in the image below; you can also remove the HelloWorld.vue component, styles and html eventually created by Vite.
Now let’s run the command to install Vue Router.
yarn add vue-router@4Inside the router folder, we’ll create a routes.js file, where we’ll build the routes we’ll have in the basic structure.
// src/router/routes.js
import { createRouter, createWebHistory } from 'vue-router';

const router = createRouter({
  history: createWebHistory(),
  routes: [
    {
      path: '/',
      component: () => import('@/views/layout/Layout.vue'),
      children: [
        {
          path: '',
          component: () => import('@/views/home/Home.vue'),
        },
      ],
    },
    {
      path: '/login',
      component: () => import('@/views/login/Login.vue'),
    },
    // Always leave this as the last one, but you can also remove it
    {
      path: '/:catchAll(.*)*',
      component: () => import('@/views/notFound/ErrorNotFound.vue'),
    },
  ],
});

export default router;
Notice that in the routes file we have four components: Layout, Home, Login and ErrorNotFound. We can create these files in their respective folders. The “@” alias might not be configured in your vite.config.js — you’ll need to change this configuration:
import { fileURLToPath, URL } from "url";
// vite.config.js
export default defineConfig(({ mode }) => {
  return {
    resolve: {
      alias: {
        "@": fileURLToPath(new URL("./src", import.meta.url)),
      },
    },
    ...
    // rest of the file
  }
})
After creating the components, we need to import and use our routes file in the project’s main.ts.
// src/main.ts
import { createApp } from 'vue';
import router from './router/routes';
...
// Rest of the file
import App from './App.vue';

const myApp = createApp(App);

myApp.use(router);

// Assumes you have a <div id="app"></div> in your index.html
myApp.mount('#app');
Now inside the App.vue and Layout.vue files you’ll add the following code.
<template>
  <router-view />
</template>
Once that’s done, if you’re running your app with yarn run dev, when accessing the urls http://localhost:5173/ or http://localhost:5173/login (the port number is subjective), you should see the content of each component that was created (if the components are empty, write a “Hello World” just to confirm it’s working).
Installing our Design System and creating basic components
Now that we already have our basic routes, let’s install the Design System we created in the last post to build a basic app structure. Create a .npmrc file at the root of your project and paste the following code.
@denisibanez:registry=https://npm.pkg.github.com/
//npm.pkg.github.com/:_authToken=${GITHUBTOKEN}
Again, we’ve already gone through this in a previous post. I “placed” the ${GITHUBTOKEN} variable directly in the system variables — in my case macOS, the commands are as follows:
export GITHUBTOKEN="text_with_the_token_value"To check if your variable is configured, run:
echo $GITHUBTOKENNOTE: I’m assuming you already have the token created, since you did it in the previous lessons. Now we’ll install our Design System with the command below:
yarn add @denisibanez/design-system-ui@latestNOTE: Both in the .npmrc file and in the command above, we have “@denisibanez” as the prefix; remember that this prefix must be the same one you configured in your Design System project.
After performing the process above, we’ll go to the Layout.vue file and add the library’s css.
// src/views/layout/Layout.vue
<style lang="scss">
// Design system css components
@import '../../../node_modules/@denisibanez/design-system-ui/dist/index.css';
</style>
With this, we can import our QcButton.vue anywhere in the application and it will work normally.
<template>
  <QcButton
    label="Botao do Design System"
    color="primary"
    size="md"
    :loading="loadingBtn"
    @click.capture="loadingBtn = !loadingBtn"
  />
</template>

<script lang="ts" setup>
// DESIGN SYSTEM
import { QcButton } from '@denisibanez/design-system-ui';

// VARIABLES
const loadingBtn: Ref<boolean> = ref(false);
</script>
With this we already have the Design System working in our structure 🤷. Now let’s go back to the components repository (Design System) and create four basic components: QcTextField, QcLayout, QcLoading and QcSnackbar.
We’ll use these components to build our Scaffolding structure. We could create them inside Scaffolding itself, but since the idea is to componentize and reuse, we’ll place them inside the Design System — so that, in a real scenario, “other teams” at our company could use them without needing to replicate code.
// Design System project — src/components/form/QcTextfield.vue
<template>
  <div class="QcTextfield__wrapper">
    <q-input
      outlined
      lazy-rules
      :label="label"
      :rules="rules"
      :type="types"
      :model-value="value"
      @update:model-value="onInput($event)"
    />
  </div>
</template>

<script lang="ts" setup>
export interface QcTextfieldInterface {
  label: string;
  value: string | null | number;
  types:
    | 'number' | 'text' | 'password' | 'textarea' | 'email'
    | 'search' | 'tel' | 'file' | 'url' | 'time' | 'date' | undefined;
  rules: Array<any>;
}
const props = withDefaults(defineProps<QcTextfieldInterface>(), {
  label: 'Label',
  types: 'text',
  value: '',
});
const $emit = defineEmits(['onInputChange']);
function onInput(text: string | null | number) {
  $emit('onInputChange', text);
}
</script>
// Design System project — src/components/loading/QcLoading.vue
<template>
<div class="QcLoading__wrapper" v-if="loading">
<q-spinner-puff :color="color" :size="size" />
<h3>{{ text }}</h3>
</div>
</template>
<script setup lang="ts">
export interface QcLoadingInterface {
color: string;
size: string;
loading: boolean;
text: string;
}
const props = withDefaults(defineProps<QcLoadingInterface>(), {
color: 'primary',
size: 'lg',
loading: false,
text: 'Carregando',
});
</script>
<style lang="scss" scoped>
.QcLoading {
&__wrapper {
min-height: 100vh;
display: flex;
align-items: center;
justify-content: center;
flex-direction: column;
}
}
</style>// Design System project — src/components/snackbar/QcSnackbar.vue
<script setup lang="ts">
import { useQuasar } from 'quasar';
import { watchEffect } from 'vue';
export interface QcSnackbarInterface {
model: boolean;
bgColor: string;
text: string;
icon: string;
actionLabelColor: string;
textColor: string;
}
const props = withDefaults(defineProps<QcSnackbarInterface>(), {
model: false,
bgColor: 'primary',
text: 'Esse é um alerta!',
icon: 'warning',
actionLabelColor: 'white',
textColor: 'white',
});
const $q = useQuasar();
function showNotifs() {
$q.notify({
progress: true,
message: props.text,
color: props.bgColor,
multiLine: false,
textColor: props.textColor,
icon: props.icon,
actions: [
{ label: 'Fechar', color: props.actionLabelColor, handler: () => {} },
],
});
}
watchEffect(() => {
if (props.model) {
showNotifs();
}
});
</script>// Design System project — src/components/layout/QcLayout.vue
<template>
<div class="Qclayout__wrapper">
<q-layout>
<q-header elevated>
<q-toolbar>
<q-btn flat dense round icon="menu" aria-label="Menu" @click="toggleLeftDrawer" />
<q-toolbar-title>{{ appName }}</q-toolbar-title>
<div @click="logoff" style="cursor: pointer">{{ logoffLabel }}</div>
</q-toolbar>
</q-header>
<q-drawer v-model="leftDrawerOpen.value" show-if-above bordered>
<q-list>
<q-item-label header v-for="item in menu" @click="navigate(item)">
{{ item.label }}
</q-item-label>
</q-list>
</q-drawer>
<q-page-container>
<slot></slot>
</q-page-container>
</q-layout>
</div>
</template>
<script setup lang="ts">
import { reactive } from 'vue';
export interface MenuInterface {
label: string;
route: string;
}
export interface QclayoutInterface {
appName?: string;
logoffLabel?: string;
menu?: any;
}
const props = withDefaults(defineProps<QclayoutInterface>(), {
appName: 'Nome da app',
logoffLabel: 'Sair',
menu: [{ label: 'menu item', route: '/' }],
});
// VARIABLES
let leftDrawerOpen = reactive({ value: false });
const $emit = defineEmits(['logoff', 'navigate']);
// METHODS
function toggleLeftDrawer() {
leftDrawerOpen.value = !leftDrawerOpen.value;
}
function navigate(item: any) {
$emit('navigate', item);
}
function logoff() {
$emit('logoff');
}
</script>Components created — it’s time to document them with Storybook. Each component gets a .stories.js file (I’ll show QcTextfield’s; the others follow the same pattern).
// src/components/form/QcTextfield.stories.js
import QcTextfield from './QcTextfield.vue';

export default {
  title: 'Components/form/textfield',
  component: QcTextfield,
  argTypes: {
    onInput: { action: 'clicked' },
    types: {
      control: { type: 'select' },
      options: ['number','text','password','textarea','email','search','tel','file','url','time','date', undefined],
    },
  },
};

const Template = (args) => ({
  components: { QcTextfield },
  setup() {
    return { args };
  },
  template: '<QcTextfield v-bind="args" @onInputChange="value = $event" />',
});

export const Primary = Template.bind({});
Primary.args = {
  label: 'label',
  types: 'text',
  rules: [(val) => (val !== null && val !== '') || 'Campo obrigatório'],
  value: '',
};
Also, we need to make a small adjustment to the project settings to use quasar’s snackbar.
// src/main.ts
import { Notify } from 'quasar';
// rest of the file
...
myApp.use(Quasar, {
  plugins: {
    Notify,
  }, // import Quasar plugins here
});
We can’t forget to create the index files, one for each component, and then update the index.ts inside the src folder to export everything.
// one index.ts per component, e.g. src/components/loading/index.ts
export { default as QcLoading } from './QcLoading.vue';

// src/index.ts
import type { App } from 'vue';
import QcButton from '@/components/buttons/QcButton.vue';
import QcLoading from '@/components/loading/QcLoading.vue';
import QcSnackbar from '@/components/snackbar/QcSnackbar.vue';
import QcTextfield from '@/components/form/textField/QcTextfield.vue';
import QcLayout from '@/components/layout/QcLayout.vue';

export default {
  install: (app: App) => {
    app.component('QcButton', QcButton);
    app.component('QcLoading', QcLoading);
    app.component('QcSnackbar', QcSnackbar);
    app.component('QcTextfield', QcTextfield);
    app.component('QcLayout', QcLayout);
  },
};

export { QcButton, QcTextfield, QcSnackbar, QcLoading, QcLayout };
Now yes! Everything’s ready. You’ll probably get this screen when running yarn run storybook:
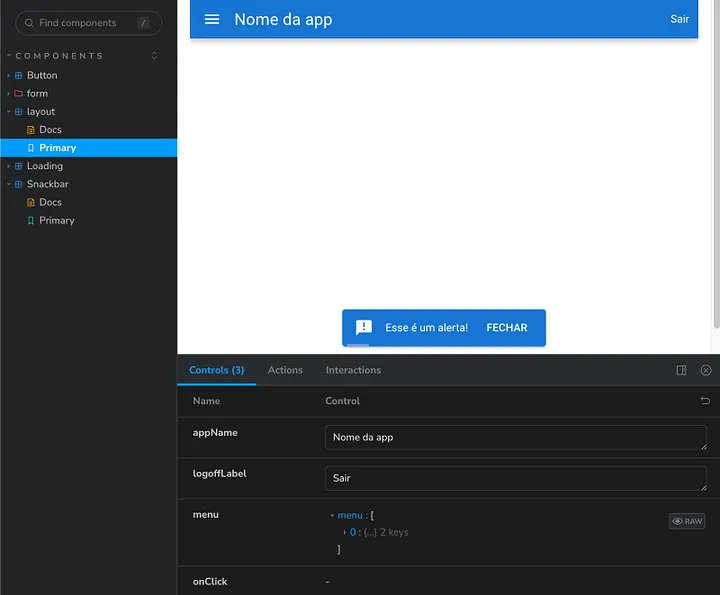
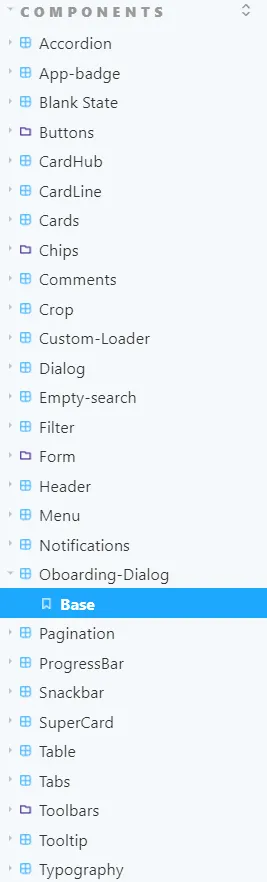
Remember I mentioned in previous posts that a single button didn’t make clear the power this kind of reusable structure could bring? In this example we start to see things taking shape. Below is the component tree I made for a project using this same concept — the speed increases a lot when developing, besides standardizing the structure.
Now we can change our project’s version in package.json and run the commands below to build and publish our changes.
yarn run build
npm publish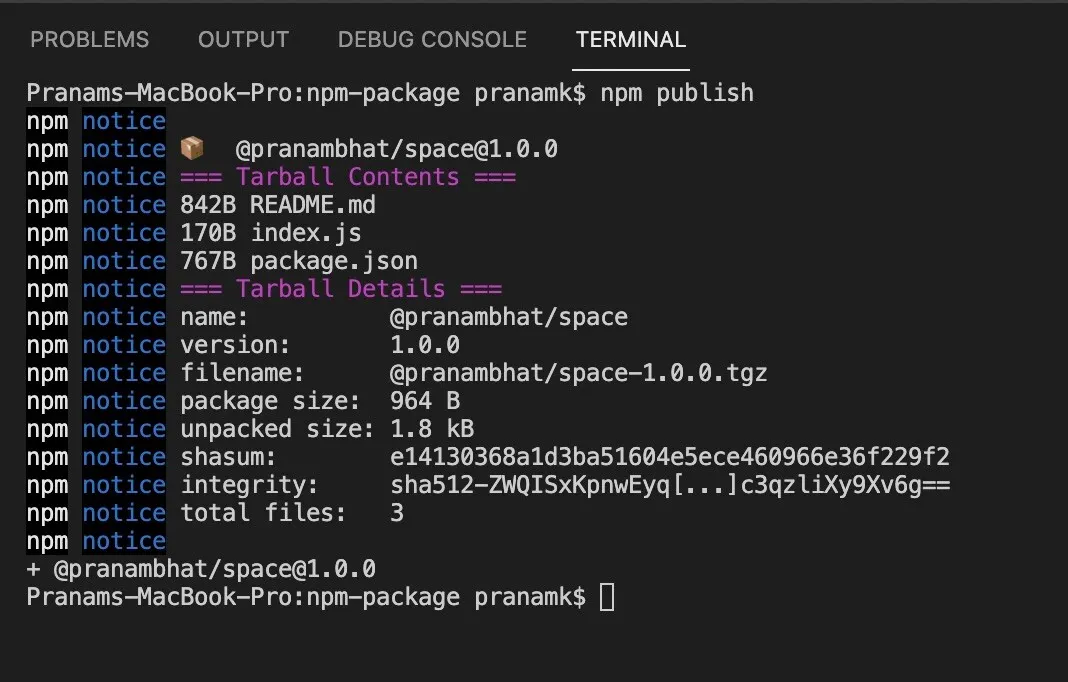
Going back to our Scaffolding app, we can install the components update from the Design System by running the command below. (Remember that “@denisibanez” is the name of our library.)
yarn add @denisibanez/design-system@latestLet’s use the components created in the Design System to build our layout structure in the Scaffolding project, modifying the Layout.vue and Login files.
// src/views/layout/Layout.vue
<template>
  <div>
    <QcLayout @logoff="onLogoff" @navigate="onNavigate($event)">
      <RouterView></RouterView>
      <!-- <QcLoading :loading="LOADING_STATE" size="xl" text="Aguarde" /> -->
      <!-- <QcSnackbar :model="SNACKBAR_STATE.model" ... /> -->
    </QcLayout>
  </div>
</template>

<script setup lang="ts">
// import { QcLoading, QcSnackbar, QcLayout } from '@denisibanez/design-system-ui';
function onLogoff() {
  // let's leave it empty for now
}
function onNavigate(item: any) {
  router.push(item.route);
}
</script>

<style lang="scss">
@import '../../../node_modules/@denisibanez/design-system-ui/dist/index.css';
</style>
NOTE: For now, our application will display an error, since SNACKBAR_STATE and LOADING_STATE haven’t been defined. You can create temporary variables or just comment out the loading and snackbar components — we’ll install global state management in the future to provide these variables.
// src/views/login/Login.vue
<template>
  <div class="fullscreen bg-blue text-white text-center q-pa-md flex flex-center">
    <div class="q-pa-md bg-white rounded-borders" style="max-width: 400px">
      <q-form @submit="onSubmit" @reset="onReset" class="q-gutter-md" ref="myForm">
        <QcTextfield
          :value="user"
          :rules="[(val: any) => (val !== null && val !== '') || 'Campo obrigatório']"
          label="Usuário"
          types="text"
          @onInputChange="user = $event"
        />
        <QcTextfield
          :value="password"
          :rules="[(val: any) => (val !== null && val !== '') || 'Campo obrigatório']"
          label="Senha"
          types="password"
          @onInputChange="password = $event"
        />
        <div class="row">
          <QcButton size="md" label="Entrar" type="submit" color="primary" :loading="loading" />
          <QcButton size="md" label="Cancelar" type="reset" color="primary" flat class="q-ml-sm" />
        </div>
      </q-form>
    </div>
  </div>
</template>

<script setup lang="ts">
import { onMounted, ref } from 'vue';
import { QcSnackbar, QcTextfield, QcButton } from '@denisibanez/design-system-ui';
import { useRouter, useRoute } from 'vue-router';

let user = ref(null);
let password = ref(null);
const myForm = ref();
let loading = ref(false);
const router = useRouter();
const route = useRoute();

function onSubmit() {
  loading = ref(true);
  myForm.value.validate().then((success: any) => {
    if (success) {
      loading = ref(false);
      router.push('/');
    }
  });
}
function onReset() {
  user.value = null;
  password.value = null;
}
</script>
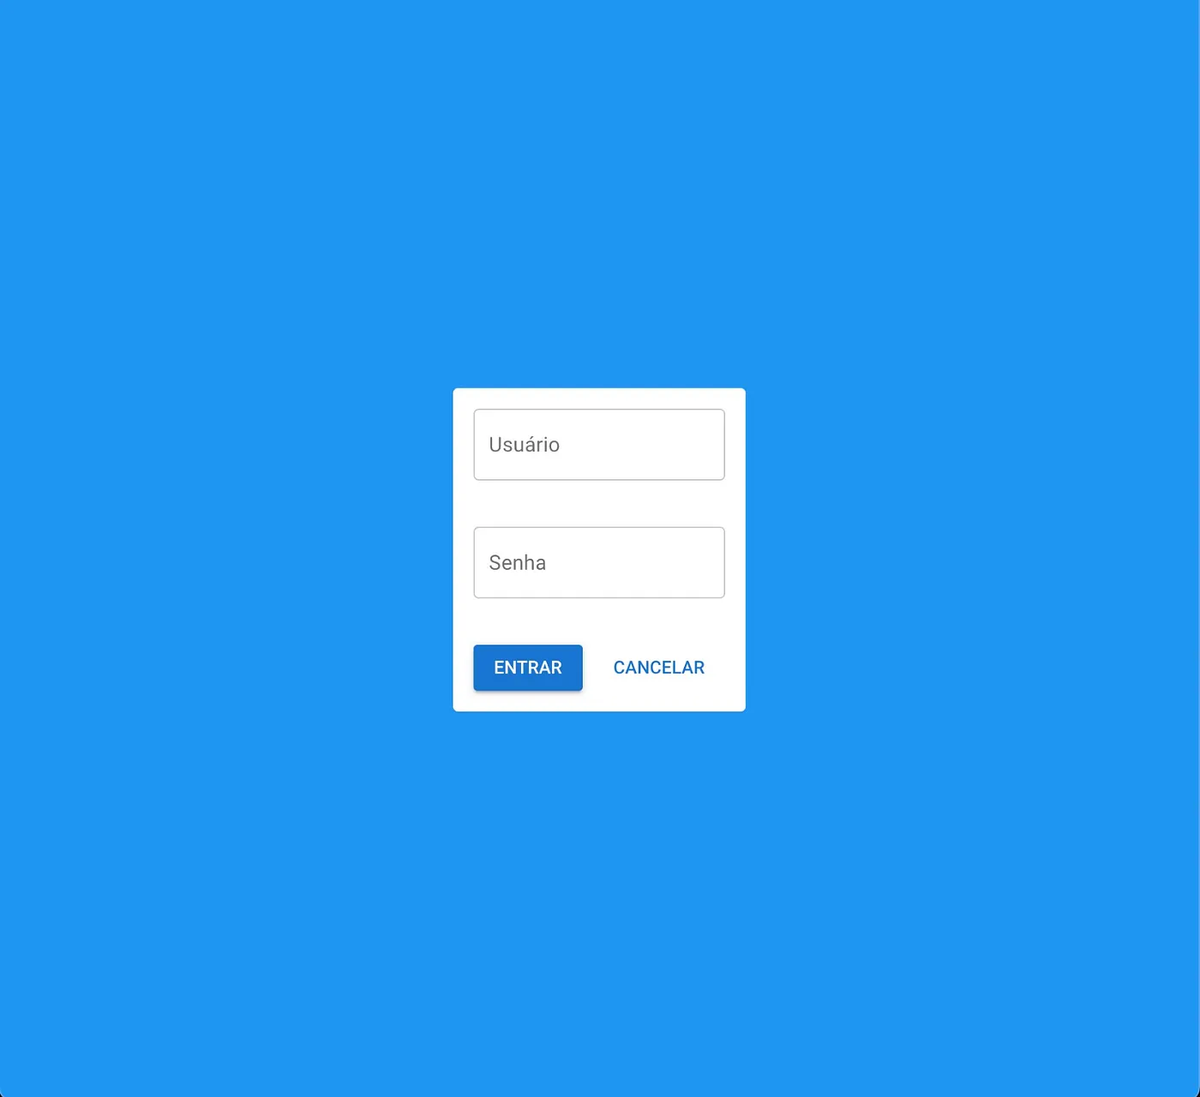
With this we’ll have a functional Login screen at the /login route, where upon “logging in” with any username and password, we’ll be redirected to home (which is empty for now).
Conclusion
This post turned out a bit bigger than I expected — I’ll leave the rest for the next tutorial. We’ll install Pinia 🍍 to control the loading and snackbar state of any component in our application, we’ll also install Axios and set up a structure of services, router guard and interceptor, besides starting to write tests for our Scaffolding app (now using Vitest), and we’ll install the VueI18n plugin to handle translations. I hope you’re enjoying it! See you in the next post.