
A Complete Vue 3 Setup — Part III

We have a beefy setup, full of tools, tests, quasar, Typescript — a real trunk full of little lego pieces. But now what, José?
There’s no point having all this if we can’t share our components with the rest of our coworkers at the company.
So, stick around — in this post I’ll show you how to provide our components via npm and github packages!
Setting up the project for sharing
First, we need to make some adjustments to the project to turn it into a lib. Let’s install some necessary dependencies.
yarn add -D rollup-plugin-typescript2 path vite-plugin-dtsSince we’re using Typescript, we’ll need to add some settings to our tsconfig.json
// tsconfig.json
{
  "compilerOptions": {
    //...
    "allowJs": true,
    "allowSyntheticDefaultImports": true,
    "forceConsistentCasingInFileNames": true,
    "noFallthroughCasesInSwitch": true,
    "declaration": true,
    "outDir": "dist",
    "declarationDir": "dist",
    "baseUrl": ".",
    "paths": {
      "@/*": [
        "./src/*"
      ]
    }
  },
  "include": [
    "src/**/*.ts",
    "src/**/*.d.ts",
    "src/**/*.tsx",
    "src/**/*.vue"
  ]
}
Also, we need to change our vite.config.ts too.
Note: Some of the settings below are from the previous tutorials (this is part 3 of the series); if you haven’t followed along since the first post, I suggest going back to my profile and checking out the rest of the project, or removing the parts that aren’t relevant to the library-sharing setup (quasar).
// vite.config.ts
import { defineConfig } from 'vite'
import vue from '@vitejs/plugin-vue'
import * as path from 'path'
import typescript2 from 'rollup-plugin-typescript2';
import dts from "vite-plugin-dts";
import { quasar, transformAssetUrls } from '@quasar/vite-plugin'

// https://vitejs.dev/config/
export default defineConfig({
  plugins: [
    vue({
      template: { transformAssetUrls }
    }),
    quasar({
      sassVariables: 'src/quasar-variables.sass'
    }),
    dts({
      insertTypesEntry: true,
    }),
    typescript2({
      check: false,
      include: ["src/components/**/*.vue"],
      tsconfigOverride: {
        compilerOptions: {
          outDir: "dist",
          sourceMap: true,
          declaration: true,
          declarationMap: true,
        },
      },
      exclude: ["vite.config.ts"]
    })
  ],
  build: {
    cssCodeSplit: true,
    lib: {
      // Could also be a dictionary or array of multiple entry points
      entry: "src/index.ts",
      name: 'myLibraryVueTs',
      formats: ["es", "cjs", "umd"],
      fileName: format => `design-system-ui.${format}.js`
    },
    rollupOptions: {
      // make sure to externalize deps that should not be bundled into your library
      input: {
        main: path.resolve(__dirname, "src/index.ts")
      },
      external: ['vue'],
      output: {
        assetFileNames: (assetInfo) => {
          if (assetInfo.name === 'main.css') return 'design-system-ui.css';
          return assetInfo.name;
        },
        exports: "named",
        globals: {
          vue: 'Vue',
        },
      },
    },
  },
  resolve: {
    alias: {
      '@': path.resolve(__dirname, 'src'),
    },
  },
})
We’ll also create a src/vite-env.d.ts file in the src folder.
// src/vite-env.d.ts
declare module '*.vue' {
  import type { DefineComponent } from 'vue'
  const component: DefineComponent<{}, {}, any>
  export default component
}
Now we’ll go into the button folder created in the previous tutorials, src/components/buttons, and create an index.ts, which will be responsible for exporting our component.
// src/components/buttons/index.ts
export { default as QcButton } from './QcButton.vue';
Right after that, we’ll create an index.ts file in the src folder, which will be responsible for exporting all the components (right now we only have the button, but the idea is that you’ll create as many as needed and keep adding them to this file).
// src/index.ts
import type { App } from 'vue';
import { QcButton } from "@/components/buttons/QcButton";

export default {
  install: (app: App) => {
    app.component('QcButton', QcButton);
  }
};

export { QcButton };
Now let’s set up our project’s package.json.
// package.json
{
  "name": "project-name", // careful, the name is related to the settings in .npmrc
  "private": false,
  "version": "0.0.1", // careful, every time you publish changes this number must go up
  "type": "module",
  "files": [
    "dist"
  ],
  "main": "./dist/my-library-vue-ts.umd.js",
  "module": "./dist/my-library-vue-ts.es.js",
  "exports": {
    ".": {
      "import": "./dist/my-library-vue-ts.es.js",
      "require": "./dist/my-library-vue-ts.umd.js"
    },
    "./dist/my-library-vue-ts.css": {
      "import": "./dist/my-library-vue-ts.css",
      "require": "./dist/my-library-vue-ts.css"
    }
  },
  "types": "./dist/main.d.ts",
  // ...
}
With that done, our project is now ready to be shared; now we need to connect our npm and set up github packages.
Npm and Github packages
The first step is to create a .npmrc file at the root of the project. An important detail is the initial part of the code, which must match the package.json name (as mentioned in the comment above) — in our case it would be “@denisibanez”.
Also, I’m creating a variable named ${GITHUBTOKEN}; further ahead I’ll show you how to set it up as a system variable on my operating system (macOS) — if you’re using Windows or Linux the process might differ, and if you can’t find anything about it online you can just substitute ${GITHUBTOKEN} with the actual token directly, which also works.
// .npmrc
@denisibanez:registry=https://npm.pkg.github.com/
//npm.pkg.github.com/:_authToken=${GITHUBTOKEN}
Now we need to work a bit more on our package.json.
// package.json
{
  "name": "@denisibanez/design-system", // @denisibanez references our .npmrc
  .... // rest of the file
  // Add the lines below
  "repository": {
    "type": "git",
    "url": "https://github.com/denisibanez/design-system-ui"
  },
  "publishConfig": {
    "registry": "https://npm.pkg.github.com"
  }
}
Let’s head over to Github — we need to create a personal token to manage our package.
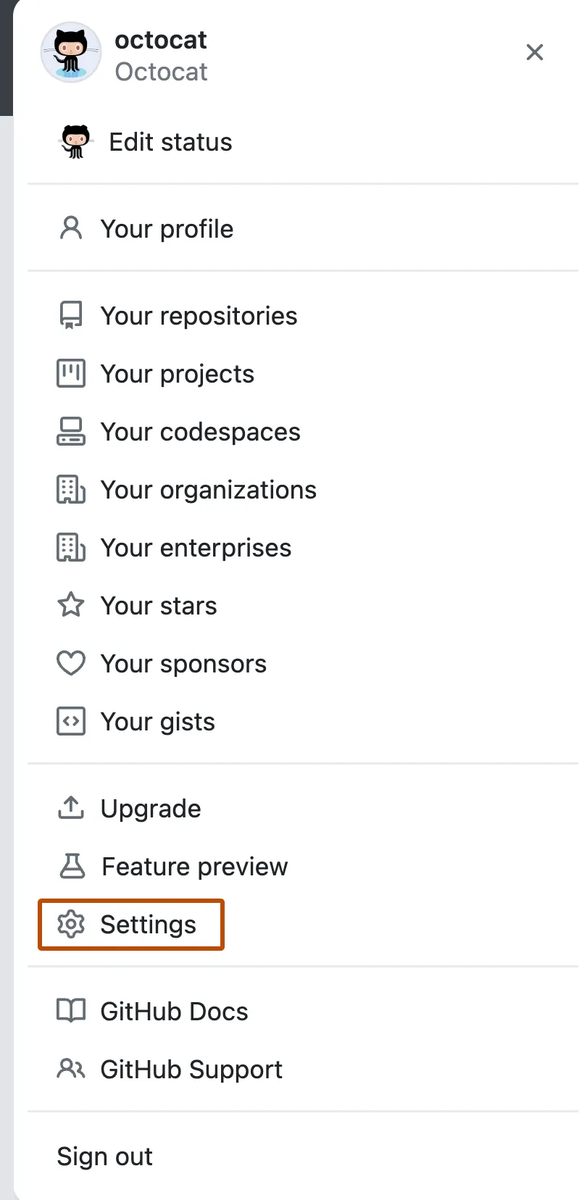
In the upper-right corner of any page, click your profile photo and then Settings.
1. In the left sidebar, click Developer settings.
2. Under Personal access tokens, click Tokens (classic). Then select Generate new token and click Generate new token (classic).
3. Give your token a descriptive name.
4. To give the token an expiration, select the Expiration dropdown and click a default or use the calendar picker.
5. Select the scopes or permissions you’d like to grant this token. To use the token to access repositories from the command line, select repo. A token with no assigned scopes can only access public information.
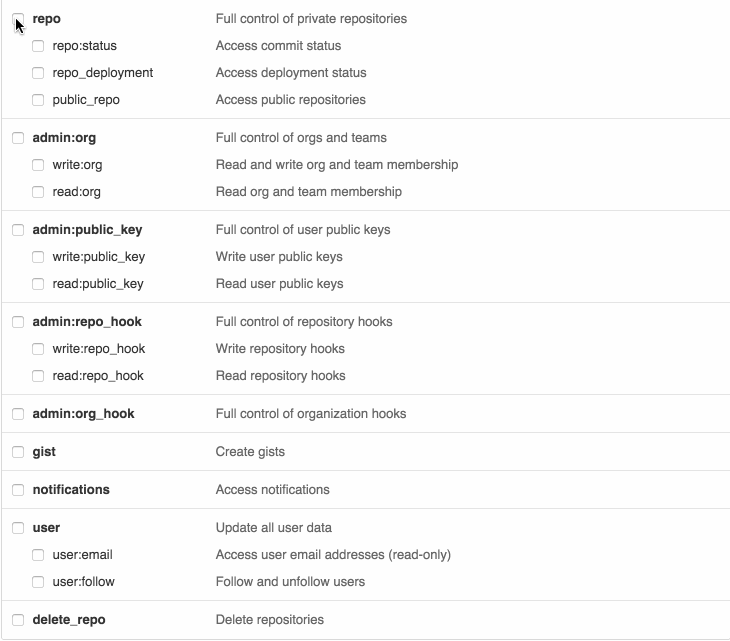
Note: I always select everything 😯.
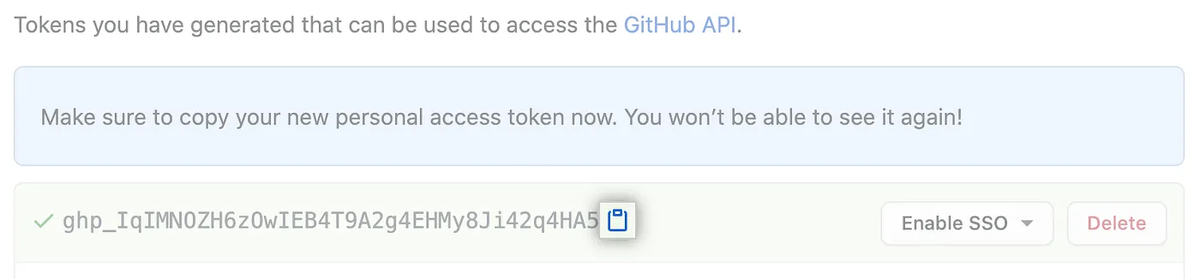
6. Click Generate token. A token will be generated and you’ll see a screen like the one below. Attention! Save this code because it won’t be shown again — if you lose it you’ll have to generate another one.
With the github token in hand, let’s create the system variable as mentioned above. I’m using macOS; if your system is different you’ll have to do some googling.
export GITHUBTOKEN="text_with_the_token_value"To check if your variable is set, run:
echo $GITHUBTOKENIf everything goes as expected, now it’s just a matter of building your components application and publishing it.
yarn run build
npm publish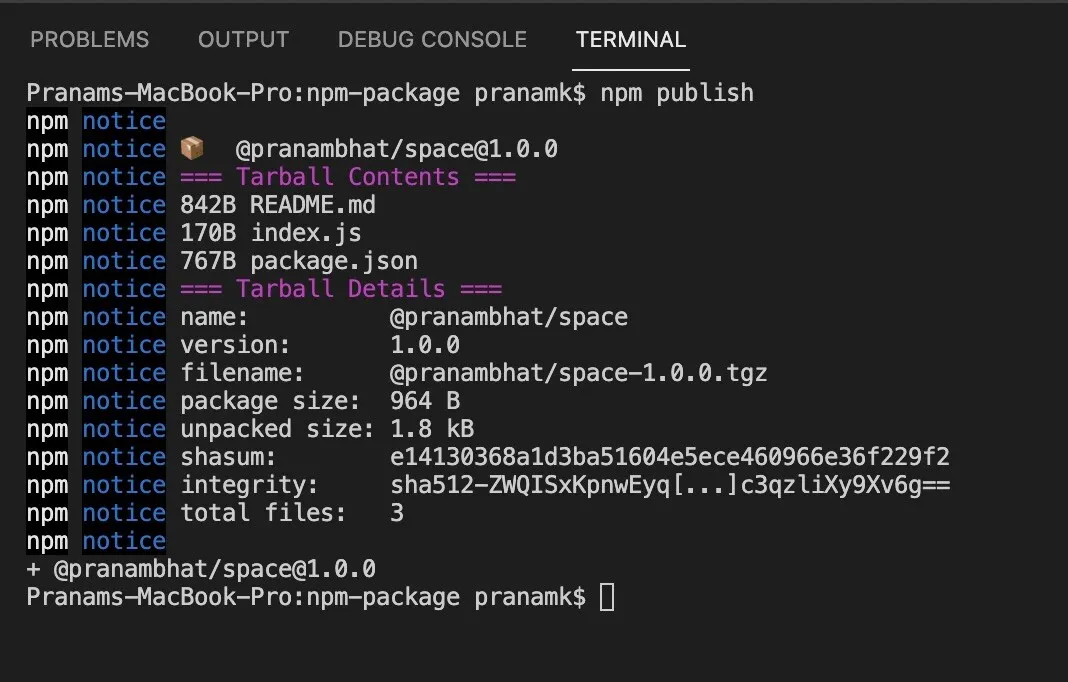
If we look at the Github repository, we’ll see that a package now appears in the packages section:
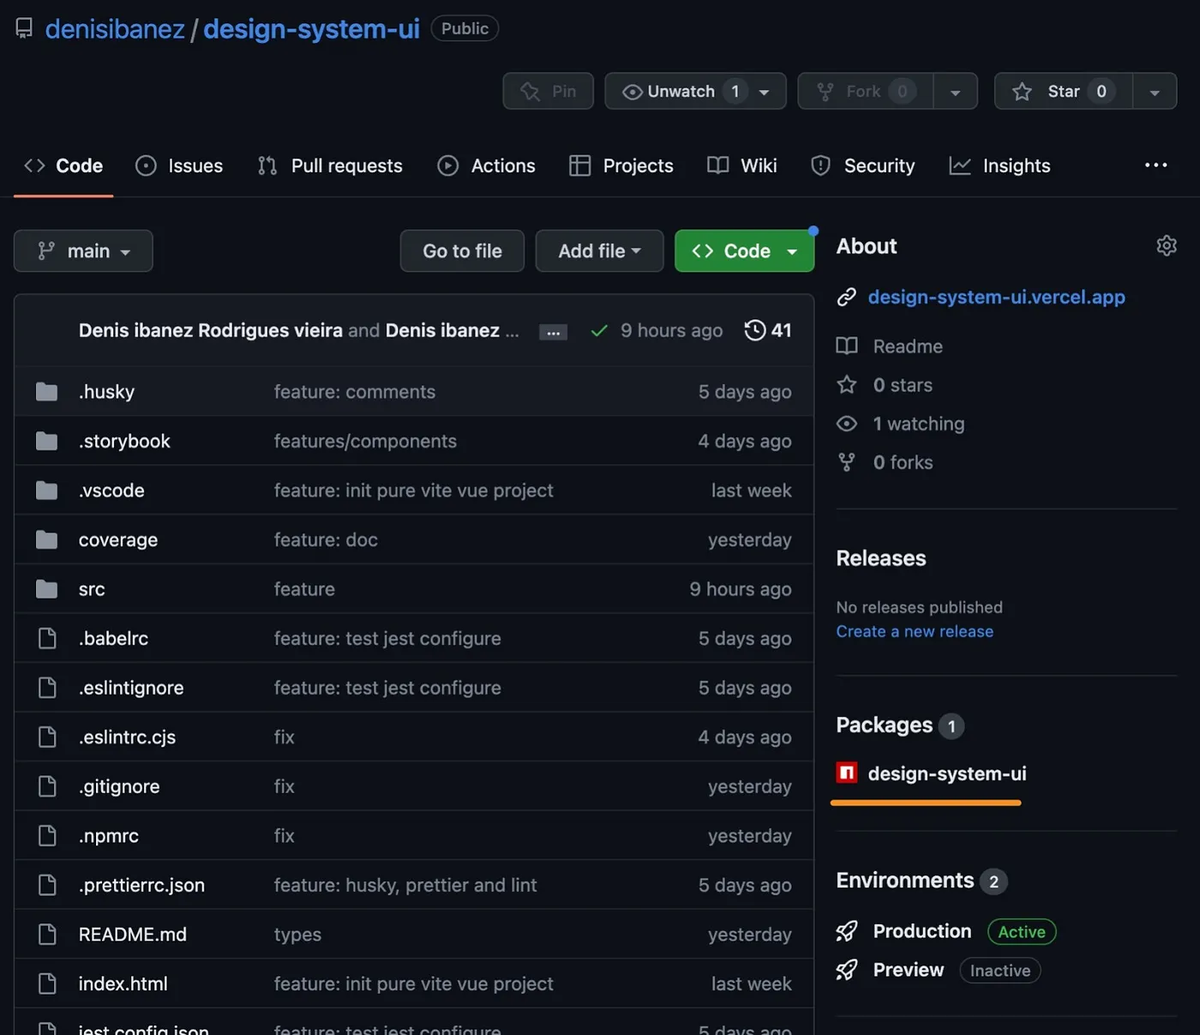
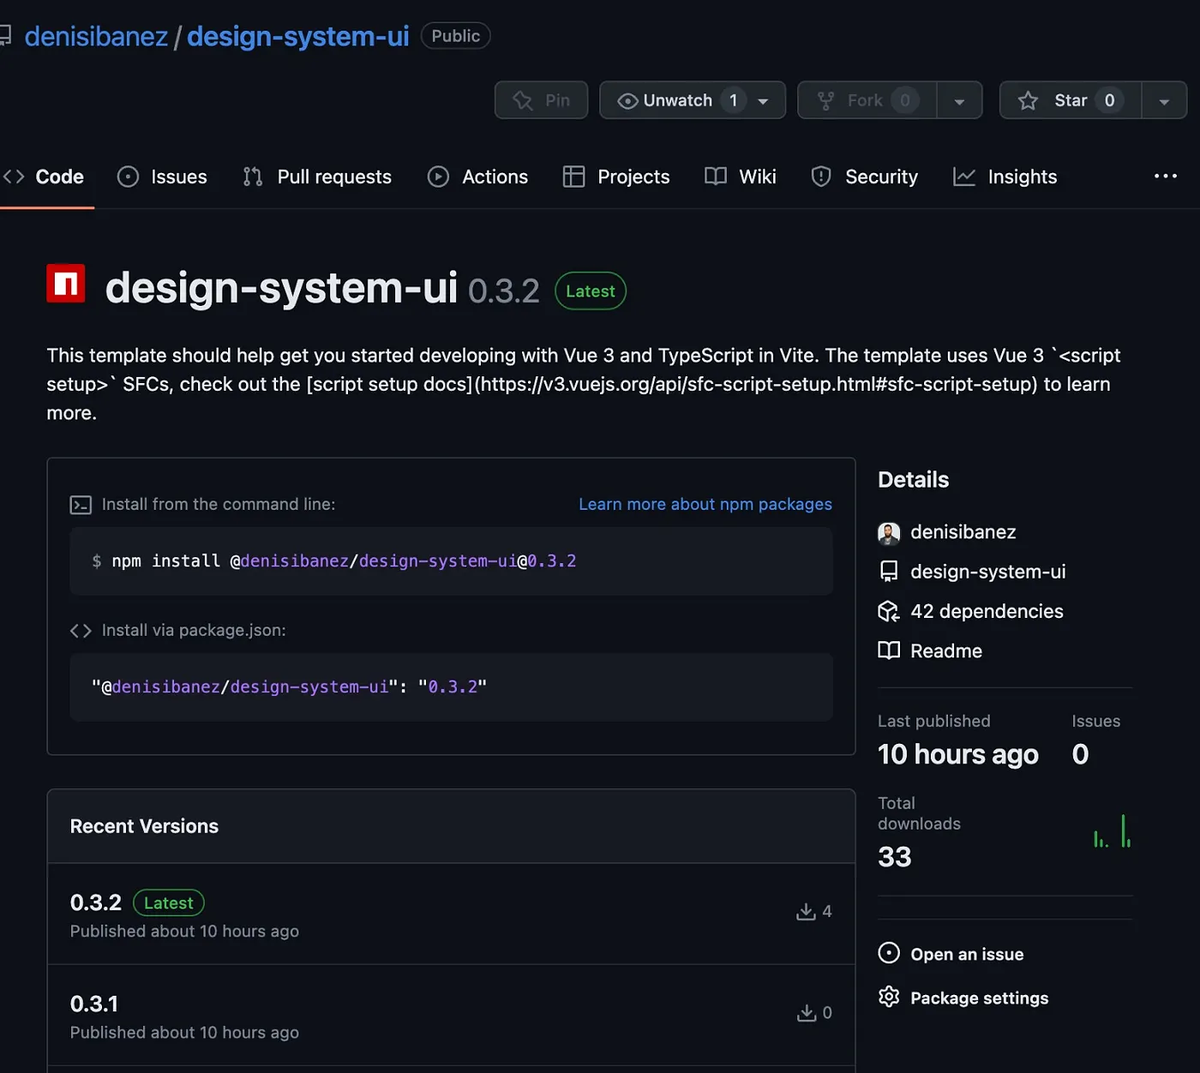
By clicking on the package name, we’ll be taken to the screen where the package’s installation information is.
Conclusion
It’s worth remembering that to install the package, the project that will use our lib needs to have quasar installed, since it’s a dependency of the project.
Also, we need to have the .npmrc in the parent project as well, but we’ll talk more about that in the next post, where we’ll start the structure of the project that will consume our components library!