
A Complete Vue 3 Setup — Part II

“Jarvis, sometimes you have to run before you can walk.” — Stark, Tony.
We start this post by paraphrasing the famous contemporary thinker, Tony Stark.
The concept behind this phrase is that, in the vast majority of cases, it’s crucial to think about tests even before developing our features.
Unfortunately in Frontend, tests are usually neglected at many companies. We can only change this reality by emphasizing how important it is to test your web app, so let’s talk a bit about that in this post.
“Tests allow you to isolate specific functionality, detect bugs early, and ensure that changes to one component don’t break other parts of the application.” — Nidhi D.
Setting up Jest
We’ll use Jest, which is currently the most famous library for web applications. Besides that, if we look closely, it’s also superior to the others (Karma, Mocha, etc.) when it comes to performance and concise syntax.
yarn add -D jest @vue/test-utilsAfter the installation, you need to create the jest configuration file. Create a file at the root of the project called .jest.config.json
// .jest.config.json
{
  "transform": {
    "^.+\\.jsx?$": "babel-jest",
    "^.+\\.vue$": "@vue/vue3-jest",
    ".+\\.(css|scss|png|jpg|svg)$": "jest-transform-stub"
  },
  "testEnvironment": "jsdom",
  "testEnvironmentOptions": {
    "customExportConditions": ["node", "node-addons"]
  },
  "moduleNameMapper": {
    "^@/(.*)$": "<rootDir>/src/$1"
  }
}
Now let’s go to our package.json and add this line to the scripts:
// package.json
"test": "jest"
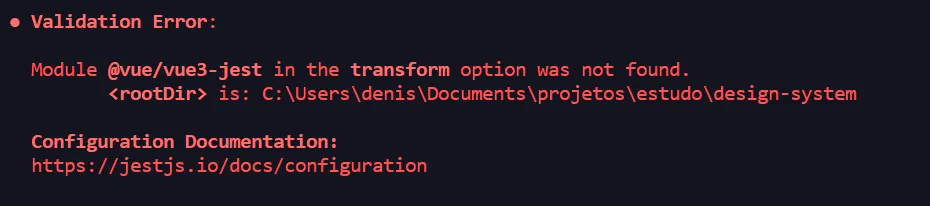
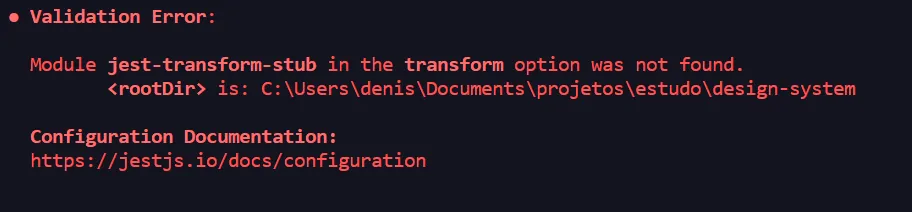
When running “yarn run test” you might run into some of the errors above. These are libraries required for the configuration to work, so run this command and the problem will be solved:
yarn add jest-transform-stub @vue/vue3-jest jest-environment-jsdomNow yes! When running “yarn run test”, you’ll see something like this in your terminal:
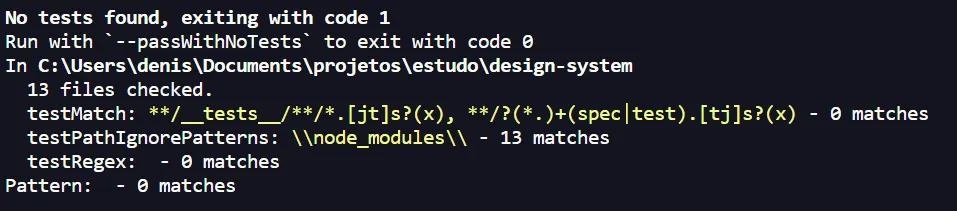
Even though it looks like an error, it means the configuration worked! We just don’t have any test file in the application yet.
If you remember the first part of this tutorial, you know we created a button component in the following folder src/components/buttons. What we’ll do next is create a QcButton.test.js file in the same folder.
// QcButton.test.js
import QcButton from './QcButton.vue';
import { mount } from '@vue/test-utils';

test('Button Works', () => {
  const wrapper = mount(QcButton);
  expect(wrapper).toBeTruthy();
});
Now that we have a valid test, you’ll probably see the following error:
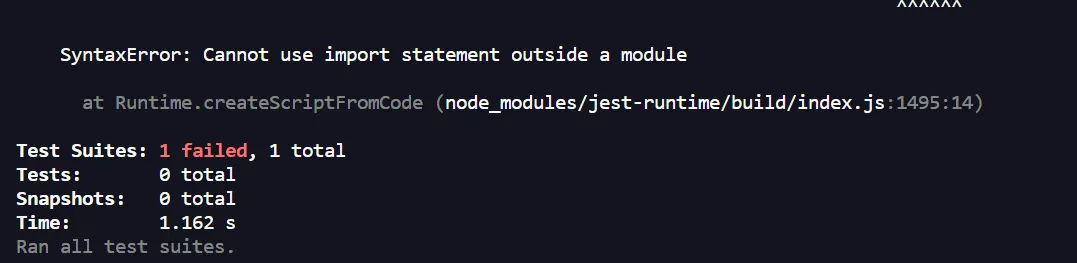
This happens because Jest runs tests in a Node.js environment, which doesn’t support the use of import by default. To fix this we’ll install babel-jest, which will help us by transpiling our javascript.
yarn add --dev babel-jest @babel/preset-envIn our jest configuration file, I had already set up babel-jest, so we’ll just need to create a .babelrc file at the root of our project.
// .babelrc
{
  "presets": ["@babel/preset-env"]
}
And now when we run our test script… success!
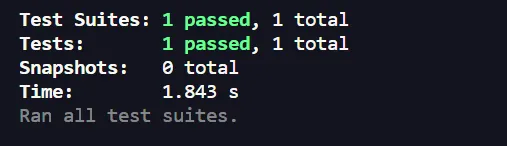
Of course this is a basic test, it only checks whether the component is being mounted. As your component grows and becomes more complex, the tests for data input/output, methods, and requests will evolve along with it.
Also, just as we talked about Storybook earlier, the technology (Vue, Angular, React, Svelte, etc.), the global state management library, the material library, and so on — all of this influences how you’ll build your test, because once the component is rendered in the test, it becomes a “mirror” of your real component, thus requiring all the helpers and libraries your real component needs to work.
That’s why it’s not uncommon for tests to blow up due to missing dependencies in the Jest file. Each case is different, and third-party libraries usually provide, in their documentation, methods for working together with Jest.
Bonus: You can run the command below to generate a coverage folder in your project. It works like a snapshot, showing which files and lines of code are covered by tests and which aren’t. Besides that, we can link the Frontend coverage with the sonarqube of the deploy pipeline, setting a minimum coverage percentage for the pipeline to deploy successfully.
yarn run test --coverage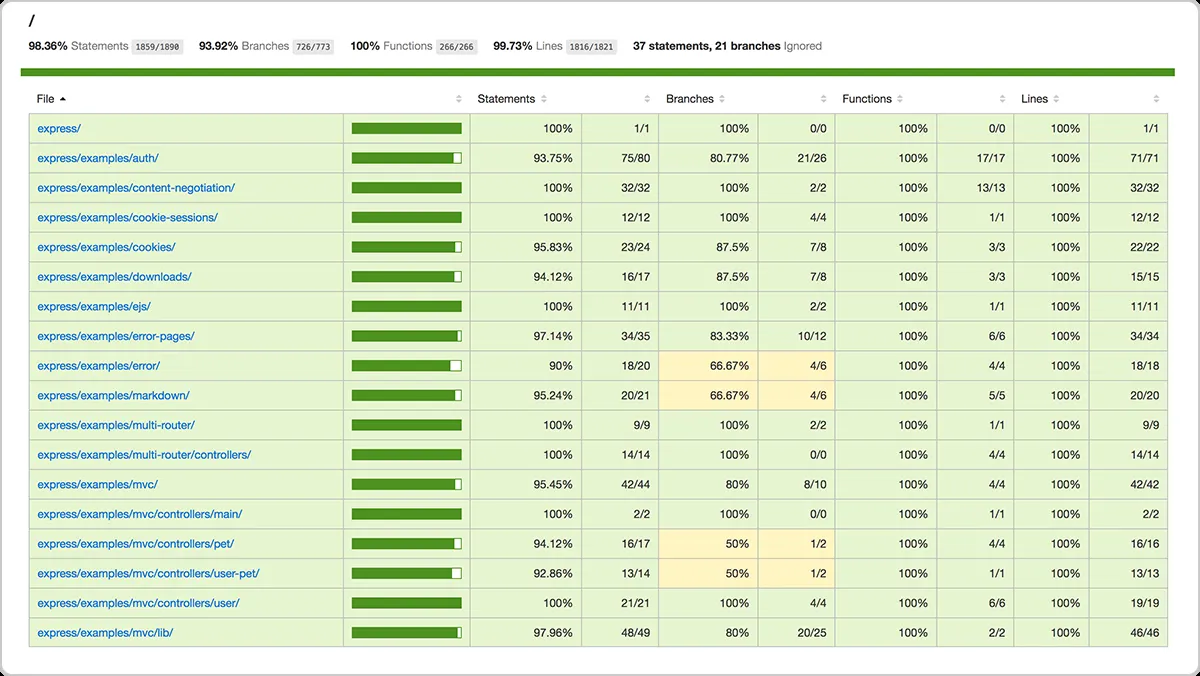
Lint, Prettier, Husky, a screwdriver and a wire

For those who’ve never had a Beetle (like me), they say that with a screwdriver and a piece of wire you can fix any kind of problem it might have on the road.
That’s the concept behind these three tools that help a lot in the day-to-day of modern Frontend. So without further ado, let’s talk about them — I’ll leave the definitions for each below.
ESLint statically analyzes your code to quickly find problems. It’s integrated into most text editors and you can run ESLint as part of your continuous integration pipeline.
In short, we use ESLint in Frontend projects so it can show us possible errors in our code, whether they’re syntax errors, logic errors, etc. It also helps us standardize the way the code is written, defining spacing, commas, quotes, line breaks, and much more!
Prettier is a code formatter that supports several file types such as JavaScript, JSX, Angular, Vue, TypeScript, HTML, CSS, SCSS, and JSON.
Basically, Prettier will help us by formatting our code so you don’t have to indent your html, css, js line by line the way the Incas used to do in the past.
Husky is a tool that lets us easily configure Git hooks and run scripts we want at certain stages. In other words, when you’re about to commit a change, or on any other Git hook, we can run commands like ESLint and Prettier, or even tests to ensure coverage.
Installing and configuring Eslint + Prettier
yarn add --dev eslint eslint-config-prettier eslint-plugin-prettier prettier eslint-plugin-vue @typescript-eslint/eslint-plugin @typescript-eslint/parserAfter installing all these dependencies, let’s start configuring. We’ll create a .eslintrc.cjs file at the root of the project.
Note: Not all of these libraries and configurations are necessary if you’re not going to use Typescript.
// .eslintrc.cjs
module.exports = {
  "env": {
    "browser": true,
    "es2021": true,
    "node": true
  },
  "extends": [
    "eslint:recommended",
    "plugin:vue/vue3-essential",
    "plugin:@typescript-eslint/recommended",
    "prettier"
  ],
  "overrides": [
  ],
  "parser": "@typescript-eslint/parser",
  "parserOptions": {
    "ecmaVersion": "latest",
    "sourceType": "module"
  },
  "plugins": [
    "vue",
    "@typescript-eslint",
    "prettier"
  ],
  "rules": {
  }
}
NOTE: One of the readers and a personal friend shared that he had some problems using the basic Typescript and Prettier plugin. It might be a good idea to use the Vue-specific ones in case you run into any kind of problem:
"extends": [
  ...
  "@vue/typescript/recommended",
  "@vue/prettier",
  "@vue/prettier/@typescript-eslint"
],
...
Now let’s add the following scripts to our package.json
"lint": "eslint src --ext \"**/*.{ts,tsx,vue}\" --no-error-on-unmatched-pattern",
"lint:fix": "eslint src --ext \"**/*.{ts,tsx,vue}\" --fix --no-error-on-unmatched-pattern",
"format": "npx prettier \"src/**/*.{js,jsx,ts,tsx,html,css,scss,vue}\" --write"
Besides that, we need to create a .prettierrc.json file at the root of the project. I’ll leave some default configurations, but both in the Prettier file and in ESLint, the rules can be customized in whatever way best suits your project.
// .prettierrc.json
{
  "trailingComma": "es5",
  "printWidth": 80,
  "singleQuote": true,
  "useTabs": false,
  "tabWidth": 2,
  "semi": true,
  "bracketSpacing": true
}
With that, we have our entire environment configured and we can run the commands below to format or fix our code.
// Prettier
yarn run format

// ESLint
yarn run lint:fix
Installing and configuring Husky 🐺
Prerequisite: make sure you’ve initialized your project with git init.
npx husky-init && yarn
npx husky install
npx husky add .husky/pre-commit "npm run lint:fix"
npx husky add .husky/pre-commit "npm run format"
Running these commands in sequence, we’ll have our husky installed and configured to run ESLint and Prettier on every commit! There are many other hooks and you can use them in whatever way works best for your project.
Conclusion
It’s a lot of tools, I know! Frontend is a tangle of pieces that in the end become a beautiful unicorn, or in this case, a project.
Over time everything gets easier and you start working organically with all of it, and trust me, your productivity will increase in a crazy way, your code tested with Jest will be less buggy, and the quality of your web apps will be elevated. Like any change, it can be hard at the beginning, but don’t forget: practice makes perfect.
In the next post we’ll talk a bit about how to provide our component library using NPM and Github Packages, so stay tuned so you don’t miss it.